Ready to upgrade your car’s entertainment? This install guide will walk you through adding a 9 inch headrest screen to your vehicle. You don’t need to be a pro to get great results—just follow the instructions and use some basic tools. Many DIYers run into a few common challenges:
Picking the right 9 inch headrest screen and making sure it fits.
Having all the accessories and tools at hand for installation.
Hiding wires so your headrest and screen look neat.
Measuring carefully before you install anything.
With these instructions and a little patience, your install will look clean and professional!
Key Takeaways
Get all the tools and parts you need before you start. This helps the installation go smoothly. Take out the factory headrests and inside panels carefully. This stops damage and makes it easy to hide wires. Mark where you will cut the headrest. Cut it slowly and carefully so the screen fits. Do not hurt any safety features. Use the mounting accessories that come with the screen. Make sure the screen is tight so it does not move when you drive. Hide the wires neatly and connect the power to the cigarette lighter. Test the monitors before you put the panels back on.
Tools & Materials
Before you start your install, you’ll want to gather everything you need. Having the right tools and parts makes the job much smoother and helps you avoid last-minute trips to the store.
Essential Tools
Here’s a quick checklist of tools you’ll use most during your headrest screen install:
Screwdriver (Phillips and flathead work best for most cars)
Wire stripper and cutter
Electrical tape
Trim removal tool (plastic is safest for your car’s panels)
Measuring tape or ruler
Marker or chalk for marking placement
Tip: A screwdriver is a must-have. You’ll use it to remove the headrest, take off screws, and secure mounting accessories. Automotive experts always recommend having one handy for this job.
Parts Needed
You’ll need a few key parts to make sure your screen stays put and works well. Most headrest monitor kits come with these, but double-check before you start:
9 inch headrest screen (choose a model that fits your car)
Screws and mounting accessories (often labeled as accessories 1, 2, 3, and 4)
Power adapter (usually plugs into your car’s cigarette lighter)
Wiring harness or cables for video and power
Clips or fasteners for securing wires
When you pick your parts, look for sturdy materials. Metallic mounts or high-quality plastics hold up best against bumps and vibrations. Some brands even use steel for extra strength, which keeps your screen safe and secure.
Here’s a quick look at some popular 9 inch headrest screens:
Model | Consumer Rating (Stars) | Number of Reviews | Key Features |
|---|---|---|---|
Audiovox AVXMTGHR9HD | 6 | 9″ HD, DVD, HDMI input | |
Accele DVD9855 | 4.0 | 1 | DVD, HDMI, USB/SD, wireless headphones |
Pyle PLD94BK | 4.0 | 2 | DVD/CD, FM, USB/SD, HDMI, universal mounting |
Accele DVD9850 | 3.0 | 5 | LCD, DVD, remote, adjustable mounting |
Rockville RVD951 | N/A | N/A | Dual system, DVD, USB/SD, HDMI, game controllers |
Optional Items
You might want to grab a few extras to make your install even easier:
Wire snake or fish tape (for pulling wires through tight spots)
Zip ties or Velcro straps (to keep wires neat)
Extra fuses (just in case)
Cleaning cloth (for wiping down your new screen)
With these tools and materials ready, you’ll be set for a smooth and professional-looking install.
Preparation
Remove Headrests
Start by removing the headrest from your seat. Most cars make this step easy. You just press the release button at the base of each post and pull the headrest straight up. If you need to remove factory headrests that feel stuck, wiggle them gently while pulling. Some vehicles have a small clip or latch under the seat. Check your owner’s manual if you get stuck. These instructions help you avoid breaking anything.
Tip: Keep all the parts you take off in a small container. You don’t want to lose any clips or screws.
You need to remove factory headrests before you can install the new screen. Take your time and don’t force anything. If you rush, you might damage the seat or the headrest.
Access Interior Panels
Next, you need to get to the inside of your car’s panels. This step lets you hide the wires for your headrest screen. Use a trim removal tool to pop off panels along the door sills, under the dash, or near the fuse box. Work slowly and use gentle pressure. Most panels snap off with a little effort.
Remove panels only as far as you need to run wires.
Set each panel aside in order, so you remember where they go.
Safety First: Always disconnect your car’s battery before working near electrical parts. This keeps you safe from shocks.
Mark Screen Placement
Now, grab your measuring tape and marker. Hold the new headrest screen up to the headrest. Mark the spot where you want the screen to sit. Double-check your marks before you cut anything. Good placement makes the screen easy to see and keeps your install looking sharp.
Follow these instructions step by step. Careful prep helps you get a clean, pro look and keeps your car safe.
9 Inch Headrest Screen Install

Cut Headrest
You have your tools ready and your marks set. Now it’s time to cut the headrest. Take a deep breath and go slow. Use a sharp utility knife or a small saw. Start by cutting along the lines you marked earlier. Make shallow cuts first. This helps you avoid cutting too deep and damaging the inside of the headrest.
Most headrests have foam inside. You want to cut just enough to fit the 9 inch headrest screen. Remove the foam carefully. Try not to tear or rip it. If your headrest has wires or sensors, stop and check your car’s manual. Some vehicles use active safety headrests. Replacing these with aftermarket headrest monitors can affect your car’s safety features. It may even change your warranty coverage. Car makers like Toyota say that using non-genuine parts or changing safety headrests can limit or void your warranty, especially for safety systems.
Tip: Always double-check before you cut. If you feel unsure, ask a pro for help. Cutting the headrest right makes the rest of the install much easier.
Fit & Secure Screen
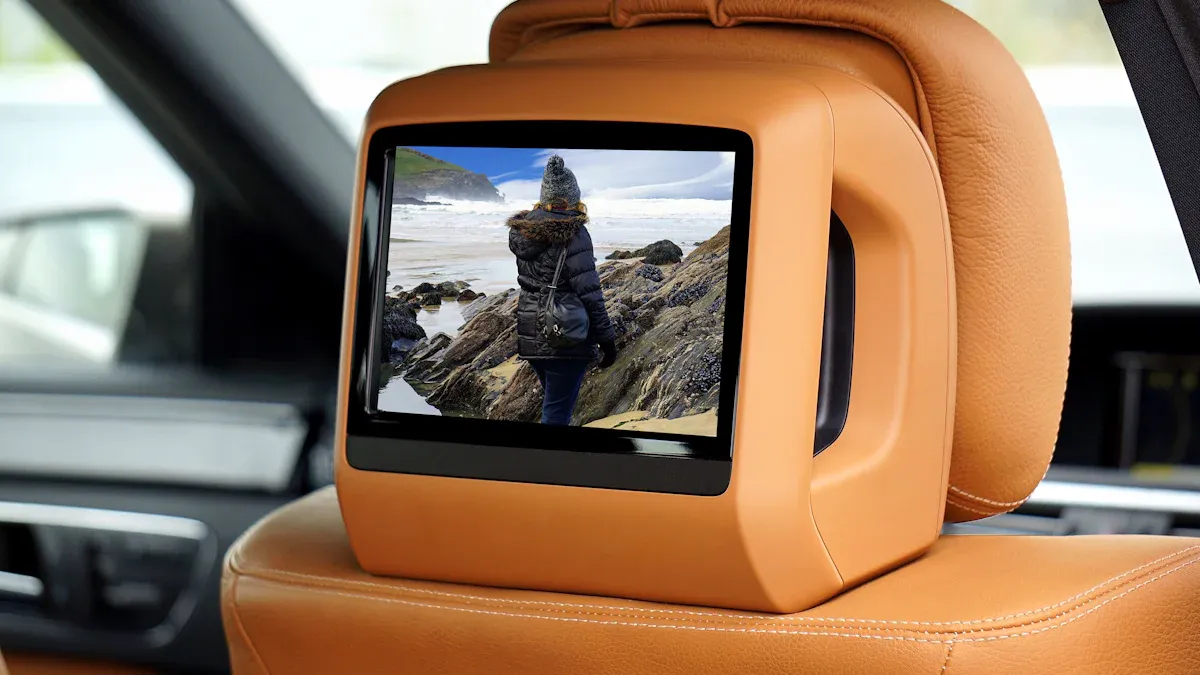
Now you’re ready to fit the screen into the headrest. Slide the 9 inch headrest screen into the opening you made. Make sure it sits flush with the surface. You want the screen to look like it came with the car. If the fit feels too tight, trim a little more foam. If it feels loose, add some padding behind the screen.
Use the mounting accessories from your kit. Most 9 inch headrest screens come with clips or brackets. Attach these to the back of the screen. Then push the screen into place. Secure it with screws or fasteners as the instructions say. Tighten everything, but don’t overdo it. You don’t want to crack the screen or damage the headrest.
Note: Some headrest monitors have a bezel or frame that snaps over the front. This hides any rough edges and gives a clean finish.
Check the screen from all angles. Make sure it sits straight and doesn’t wobble. A good fit keeps the monitor safe during bumps and turns.
Secure Headrest Monitors
You’re almost done with the hardest part. Now you need to make sure the headrest monitors stay put. Look at the back of the seat. Some kits use extra clips or straps that attach behind the headrest. Others use screws that go through the headrest and into the monitor frame. Follow the instructions in your kit for the best results.
Give the headrest a gentle shake. The monitor should not move or rattle. If it does, tighten the fasteners or add more support. You want the headrest displays to feel solid and safe.
Safety Reminder: If your car uses active safety headrests, think twice before you install aftermarket headrest screens. Changing these can turn off important safety features and may void your warranty. Always check your car’s manual and talk to your dealer if you have questions.
When you finish this step, your 9 inch headrest screen should look like it belongs in your car. The monitors should sit tight and the headrest should feel sturdy. You’re ready to move on to wiring and power!
Wiring & Power

Route Wires
You want your install to look clean, so hiding wires is key. Start by using a wire snake or fish tape. Push it under the carpet or through the seams along the seat and floor. This tool helps you pull wires from the headrest down to the power source without leaving them exposed. Tuck the wires behind panels or under trim pieces you removed earlier. Take your time and check that nothing pinches or bends the cables. If you route wires carefully, your headrest monitors will look like they came with the car.
Tip: Use zip ties or Velcro straps to bundle wires together. This keeps everything neat and stops rattling.
Connect Power Adapter
To power the monitors, you should use your car’s 12-volt cigarette lighter socket. Most 9 inch screens, like the Accele DVD9800, run on a 12-volt supply. Plug the included power adapter into the socket. Avoid tapping into the main power supply unless you know what you’re doing. This method keeps things safe and makes it easy to remove the monitors later if needed.
If you want to connect your dvd double headrest monitor to a DVD player or car stereo, check the cables in your kit. Many monitors use RCA or HDMI inputs. Sometimes you need an adapter, like a 3.5mm plug to RCA jacks or a USB-C to HDMI cable, to connect your phone or other devices. Here’s a quick table of common adapters:
Adapter Type | Use Case |
|---|---|
3.5mm to RCA | Connects to older DVD players or car stereos |
HDMI to Composite | Links modern devices to analog monitors |
AV-in/AV-out cables | Transfers video and audio between sources |
USB-C to HDMI | Mirrors phones or tablets to the monitor |
Hide Wires
Once you connect everything, double-check that all wires stay hidden. Push them back under the carpet or behind panels. Make sure nothing blocks the seat from moving. If you see any loose wires, secure them with zip ties. A tidy install not only looks better but also keeps your monitor safe from damage.
If your monitor does not turn on, check these common issues:
Make sure the car battery is not dead.
Check all cable connections for tightness.
Test the power adapter in another socket.
Inspect the wiring harness for damage.
Sometimes, a monitor shows a power light but stays off. Try holding the power button for 60 seconds to reset it. Check fuses and make sure your vehicle’s voltage is steady. Clean connectors and keep them dry for best results.
Testing & Installation Check
Test Headrest Monitors
Before you put your car back together, you need to test to see if the monitors work. Turn on your car and power up each headrest monitor. Try playing a video or connecting a device. Make sure the picture looks clear and the sound comes through. If you installed two monitors, check both screens. Try using the remote or touch controls. You want to catch any problems now, not after you finish the installation.
Tip: Let the monitors run for a few minutes. Watch for flickering, power loss, or any strange noises.
Troubleshoot Issues
If something does not work, don’t worry. Most problems with headrest monitors have simple fixes. Here are some common issues and what you can do:
The monitor does not turn on. Check if the ignition key is in the right position. Sometimes, condensation or a loose power cable can cause this.
No picture or the screen flickers. Look for pinched or strained cables, especially between the seats. A loose connector under the seat can also cause power loss.
Discs do not play. This might be because of disc incompatibility or a region code mismatch.
The picture skips or looks strange. Clean the disc or check for scratches.
No sound. Make sure all cables are secure and connected.
If you see a blown fuse, replace it with a new one.
Try resetting the system by disconnecting the car battery for a few minutes.
Note: Rerouting or replacing a cable that looks damaged can fix many monitor problems.
Reassemble Panels
Once you know everything works, you can put your car back together. Follow these steps for a smooth finish:
Reattach the rear seatback cover, making sure the clips snap into place.
Check that no cables get pinched or stuck behind the cover.
Slide the headrest back into the post guides and lock it down.
Push the rear trim cover into its clips.
Trim any extra zip tie ends.
Reinstall all the trim panels you removed earlier.
Put batteries in the headphones and store any extra accessories.
Take your time with this part. Careful reassembly keeps your installation looking neat and professional. Now you can enjoy your new headrest monitors on every drive!
You made it! When you install a 9 inch headrest screen, you follow key steps: mark and cut the headrest, fit the screen, route and secure wires, and test everything before putting panels back. Always double-check your connections for a clean, factory look. Many drivers say a headrest screen keeps passengers happy and your car looking sharp. Got questions or want to share your own headrest install story? Join forums like the Ford Edge community and connect with other DIYers!
FAQ
How long does it take to install a headrest screen?
Most people finish in about 2 to 3 hours. If you work slowly and check each step, you get a cleaner result. Take breaks if you need them.
Can I install a headrest monitor without special tools?
Yes, you can. You only need basic tools like a screwdriver, wire stripper, and trim removal tool. A wire snake helps, but you can use a coat hanger if needed.
Will installing a headrest screen void my car’s warranty?
Always check your car’s manual first. If your car has active safety headrests, installing a screen might affect your warranty. Ask your dealer before you start.
What should I do if my screen won’t turn on?
Check the power adapter.
Make sure all cables are tight.
Try another socket.
Replace the fuse if needed.
If it still does not work, contact the manufacturer for help.
Can I connect my phone to the headrest monitor?
Yes! Many headrest screens support HDMI or USB connections. You may need an adapter for your phone. Check your monitor’s manual for the right cable.
See Also
Simple Steps To Add CarPlay In Right Hand Drive Fiesta
Step By Step Guide To Installing Wireless CarPlay Adapter
Effortless 2025 W212 CarPlay Installation And Setup Guide
Installing CarPlay Adapter In Honda Civic For Canadian Drivers
